环境
系统环境:Windows10 Pro
Visual Studio 2019(16) 必须为2019版!
| 所需工具 | 版本 | 下载地址 |
|---|---|---|
| Visual Studio | 2019 16 | https://visualstudio.microsoft.com/zh-hans/vs/ |
| git | 2.34.1 | Git – Downloads (git-scm.com) |
| CMake | 3.22.1 | Index of /files/v3.22 (cmake.org) |
| Dynamorio | 源码 | https://github.com/DynamoRIO/dynamorio |
| WinAFL | 源码 | https://github.com/ivanfratric/winafl |
| Strawberry Perl | 任意 | Strawberry Perl for Windows |
| IDA pro | 7.0 + Lighthouse插件 | / |
安装步骤
Git
安装git,一路next即可,安装时记得选择自动配置环境变量,这样就可以直接在命令行中使用git
Cmake
同样一路next,记得需要勾选Add CMake to the system PATH for all users
Dynamorio
该工具主要用于动态插桩,Dynamorio最好git clone源码,然后在自己的机器上手动编译
>git clone https://github.com/DynamoRIO/dynamorio.gitPowershell走代理通道的方法:
依次输入如下两行命令$env:HTTP_PROXY="http://域名:端口"和$env:HTTPS_PROXY="http://域名:端口。比如:$env:HTTP_PROXY="http://127.0.0.1:1080"即可。
Dynamorio编译(32位)
- 找到Visual Studio安装目录,找到vcvarsall.bat所在位置:
C:\Program Files (x86)\Microsoft Visual Studio\2019\Community\VC\Auxiliary\Build- 执行如下命令:
>vcvarsall x86
>cd dynamorio源码目录
>mkdir build32 && cd build32
>cmake -G"Visual Studio 16 2019" -A Win32 ..
>cmake --build . --config RelWithDebInfo
//也可以直接使用cmake-gui来编译
使用Cmake-gui来编译:
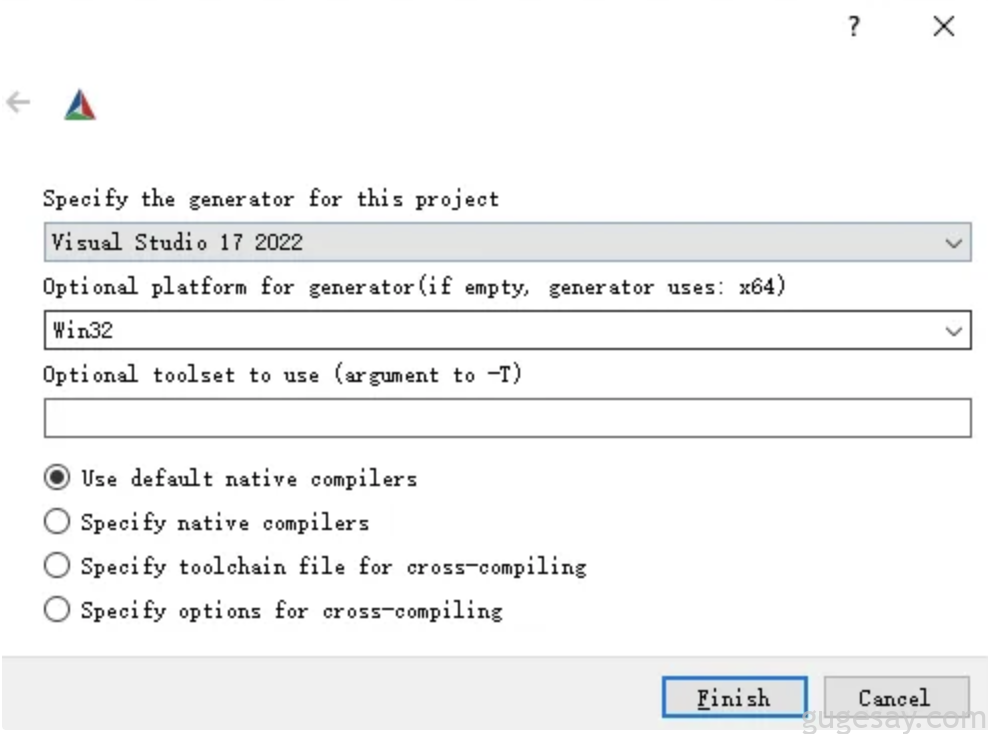
出现:
Configuring done
Generating done
即表示成功。
注1:
vcvarsall.bat,用于生成命令行编译环境:
 如果要在32位系统下生成32位代码,就执行vcvarsall x86
 如果要在32位系统下生成64位代码,就执行vcvarsall x86_amd64

 如果要在64位系统下生成32位代码,就执行vcvarsall x86
 如果要在64位系统下生成64位代码,就执行vcvarsall amd64_x86

 如果要在32位的arm平台的代码,就执行 vcvarsall x86_arm
 如果要在64位的arm平台的代码,就执行 vcvarsall amd64_arm
注2: Visual Studio 要指定于本机安装一致的版本,见下图
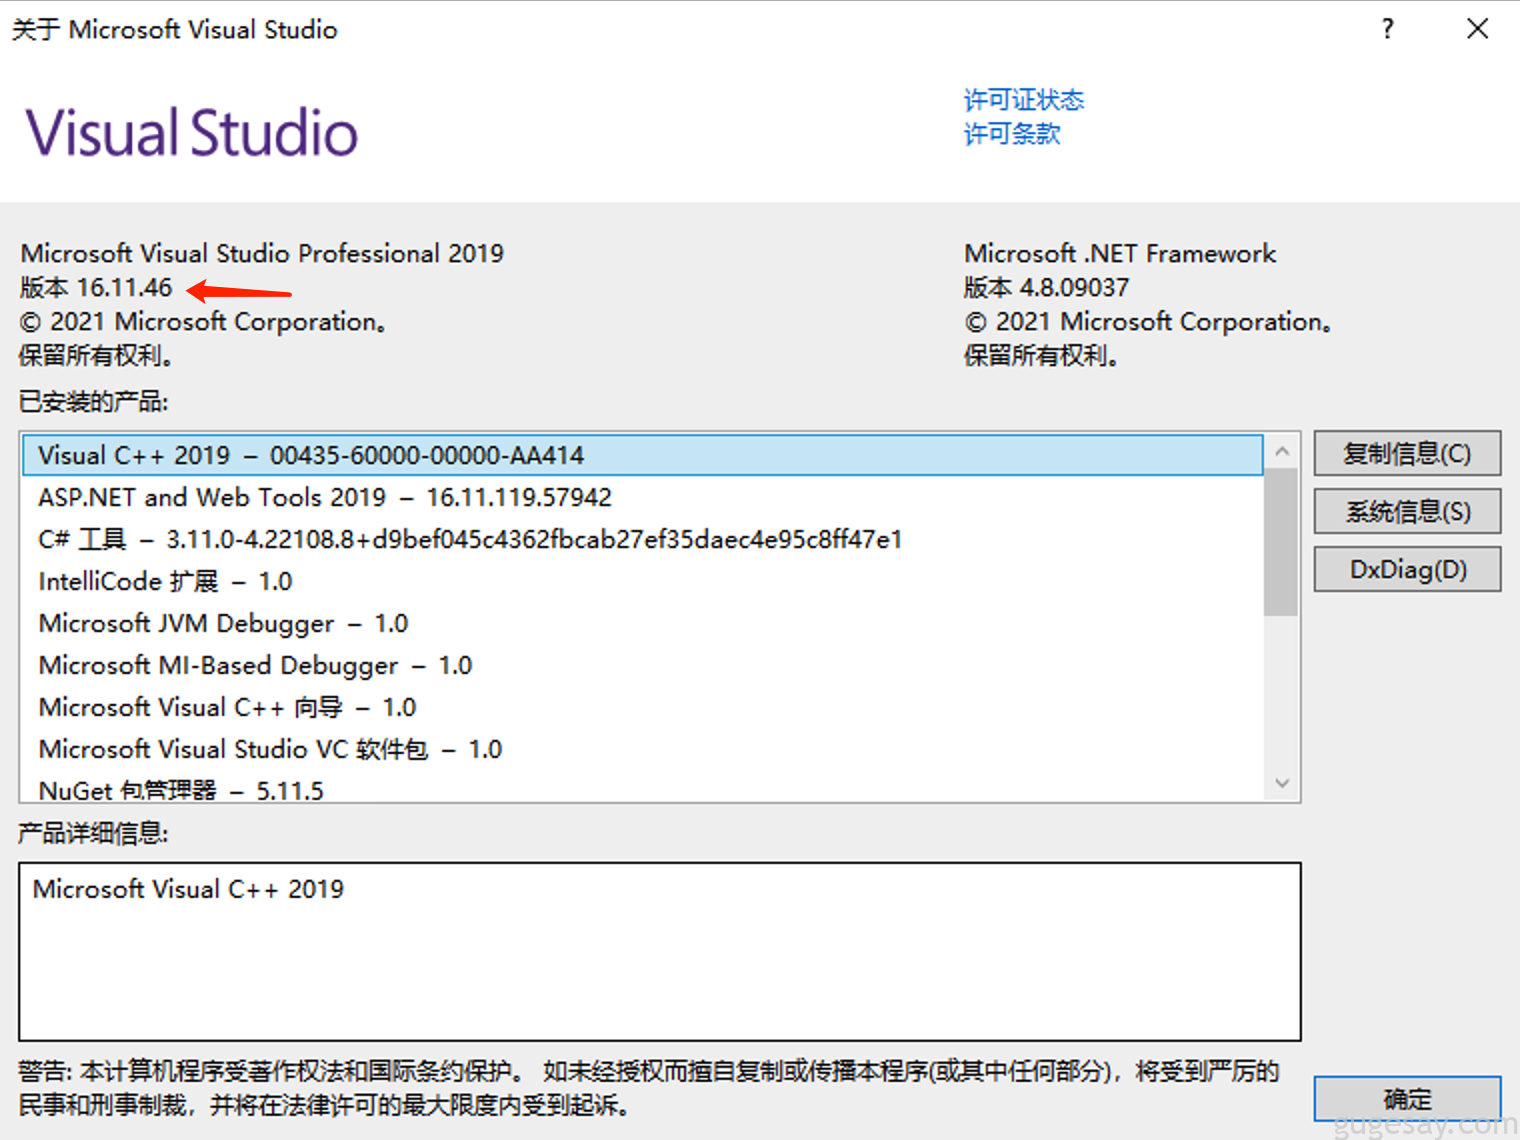
用VS打开D:\dynamorio\build32\DynamoRIO.sln项目,共有121个文件。
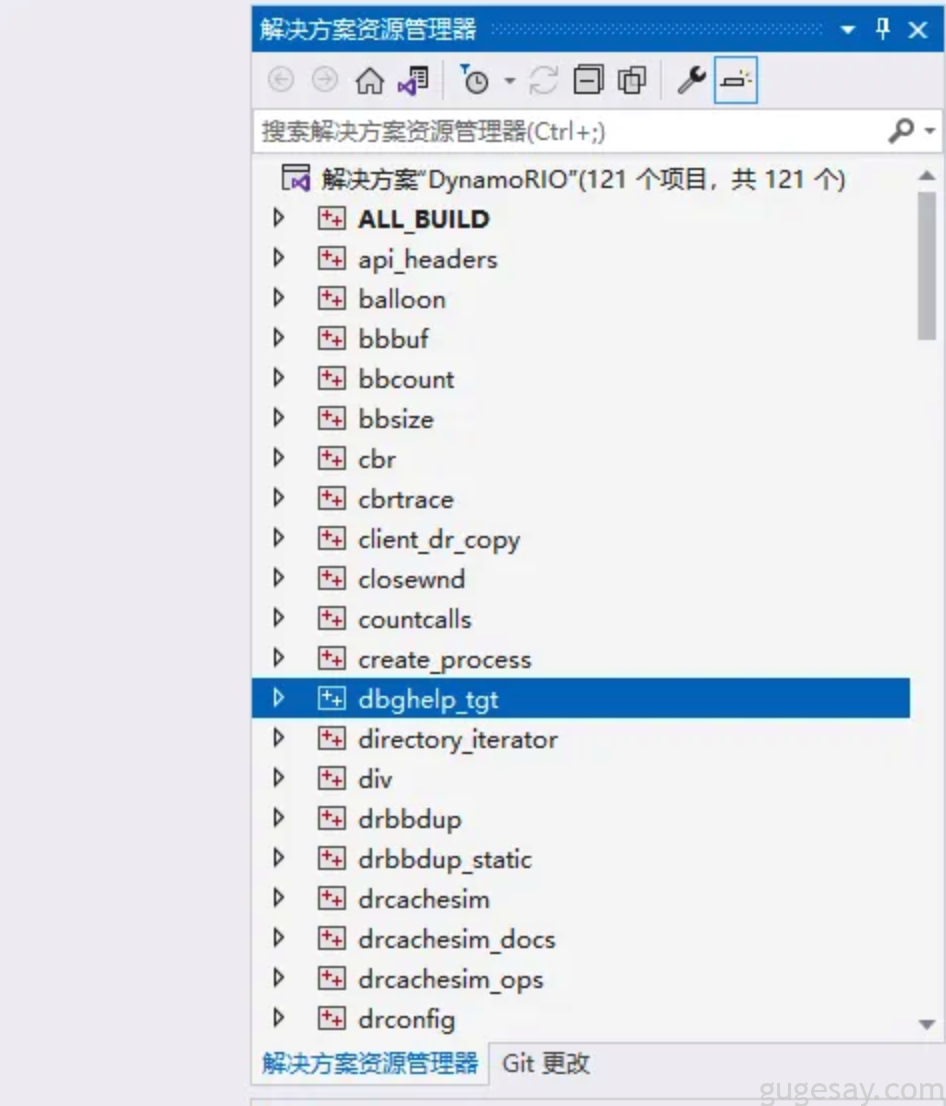
点击生成解决方案,就能一次性全部编译成功了,生成在bin32目录下:
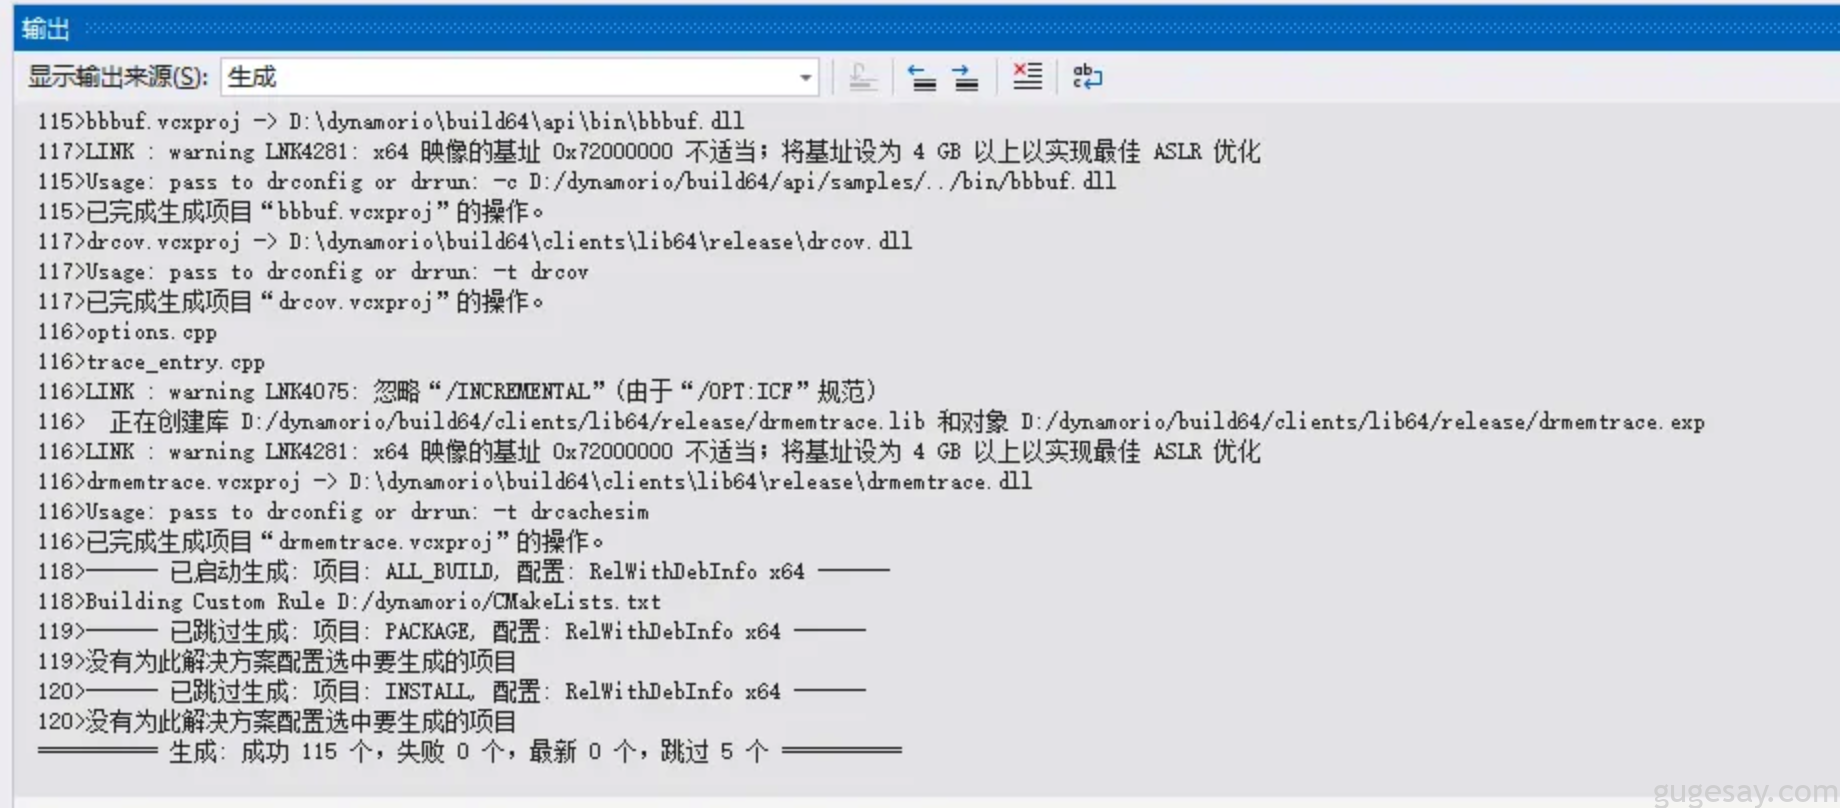
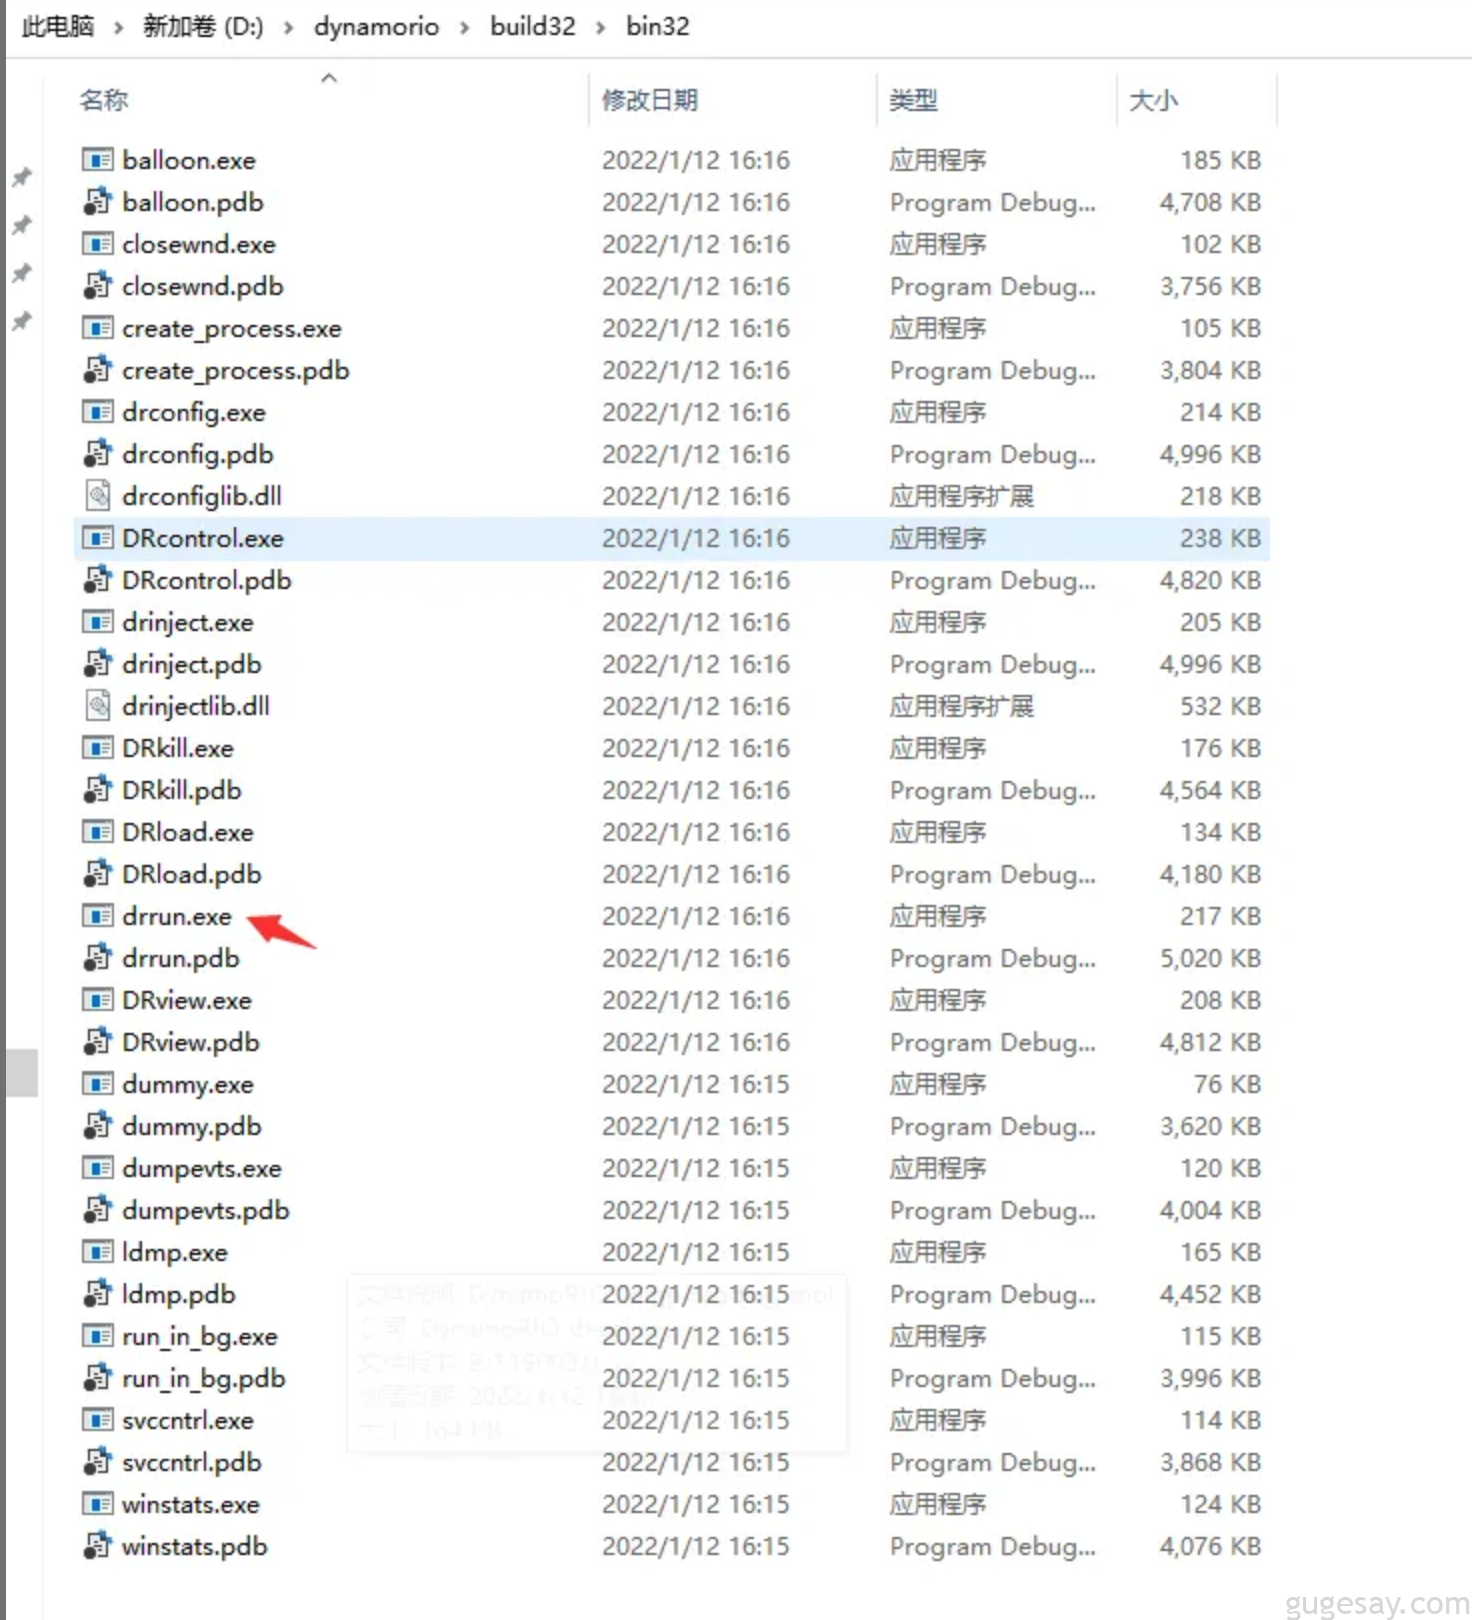
编译成功的话,在build32\bin32目录下会可以看到编译出来的drrun.exe程序就表示OK了
Dynamorio编译(64位)
>vcvarsall amd64_x86
>cd dynamorio
>mkdir build64 && cd build64
>cmake -G"Visual Studio 16 2019" -A x64 ..
>cmake --build . --config RelWithDebInfo
编译:
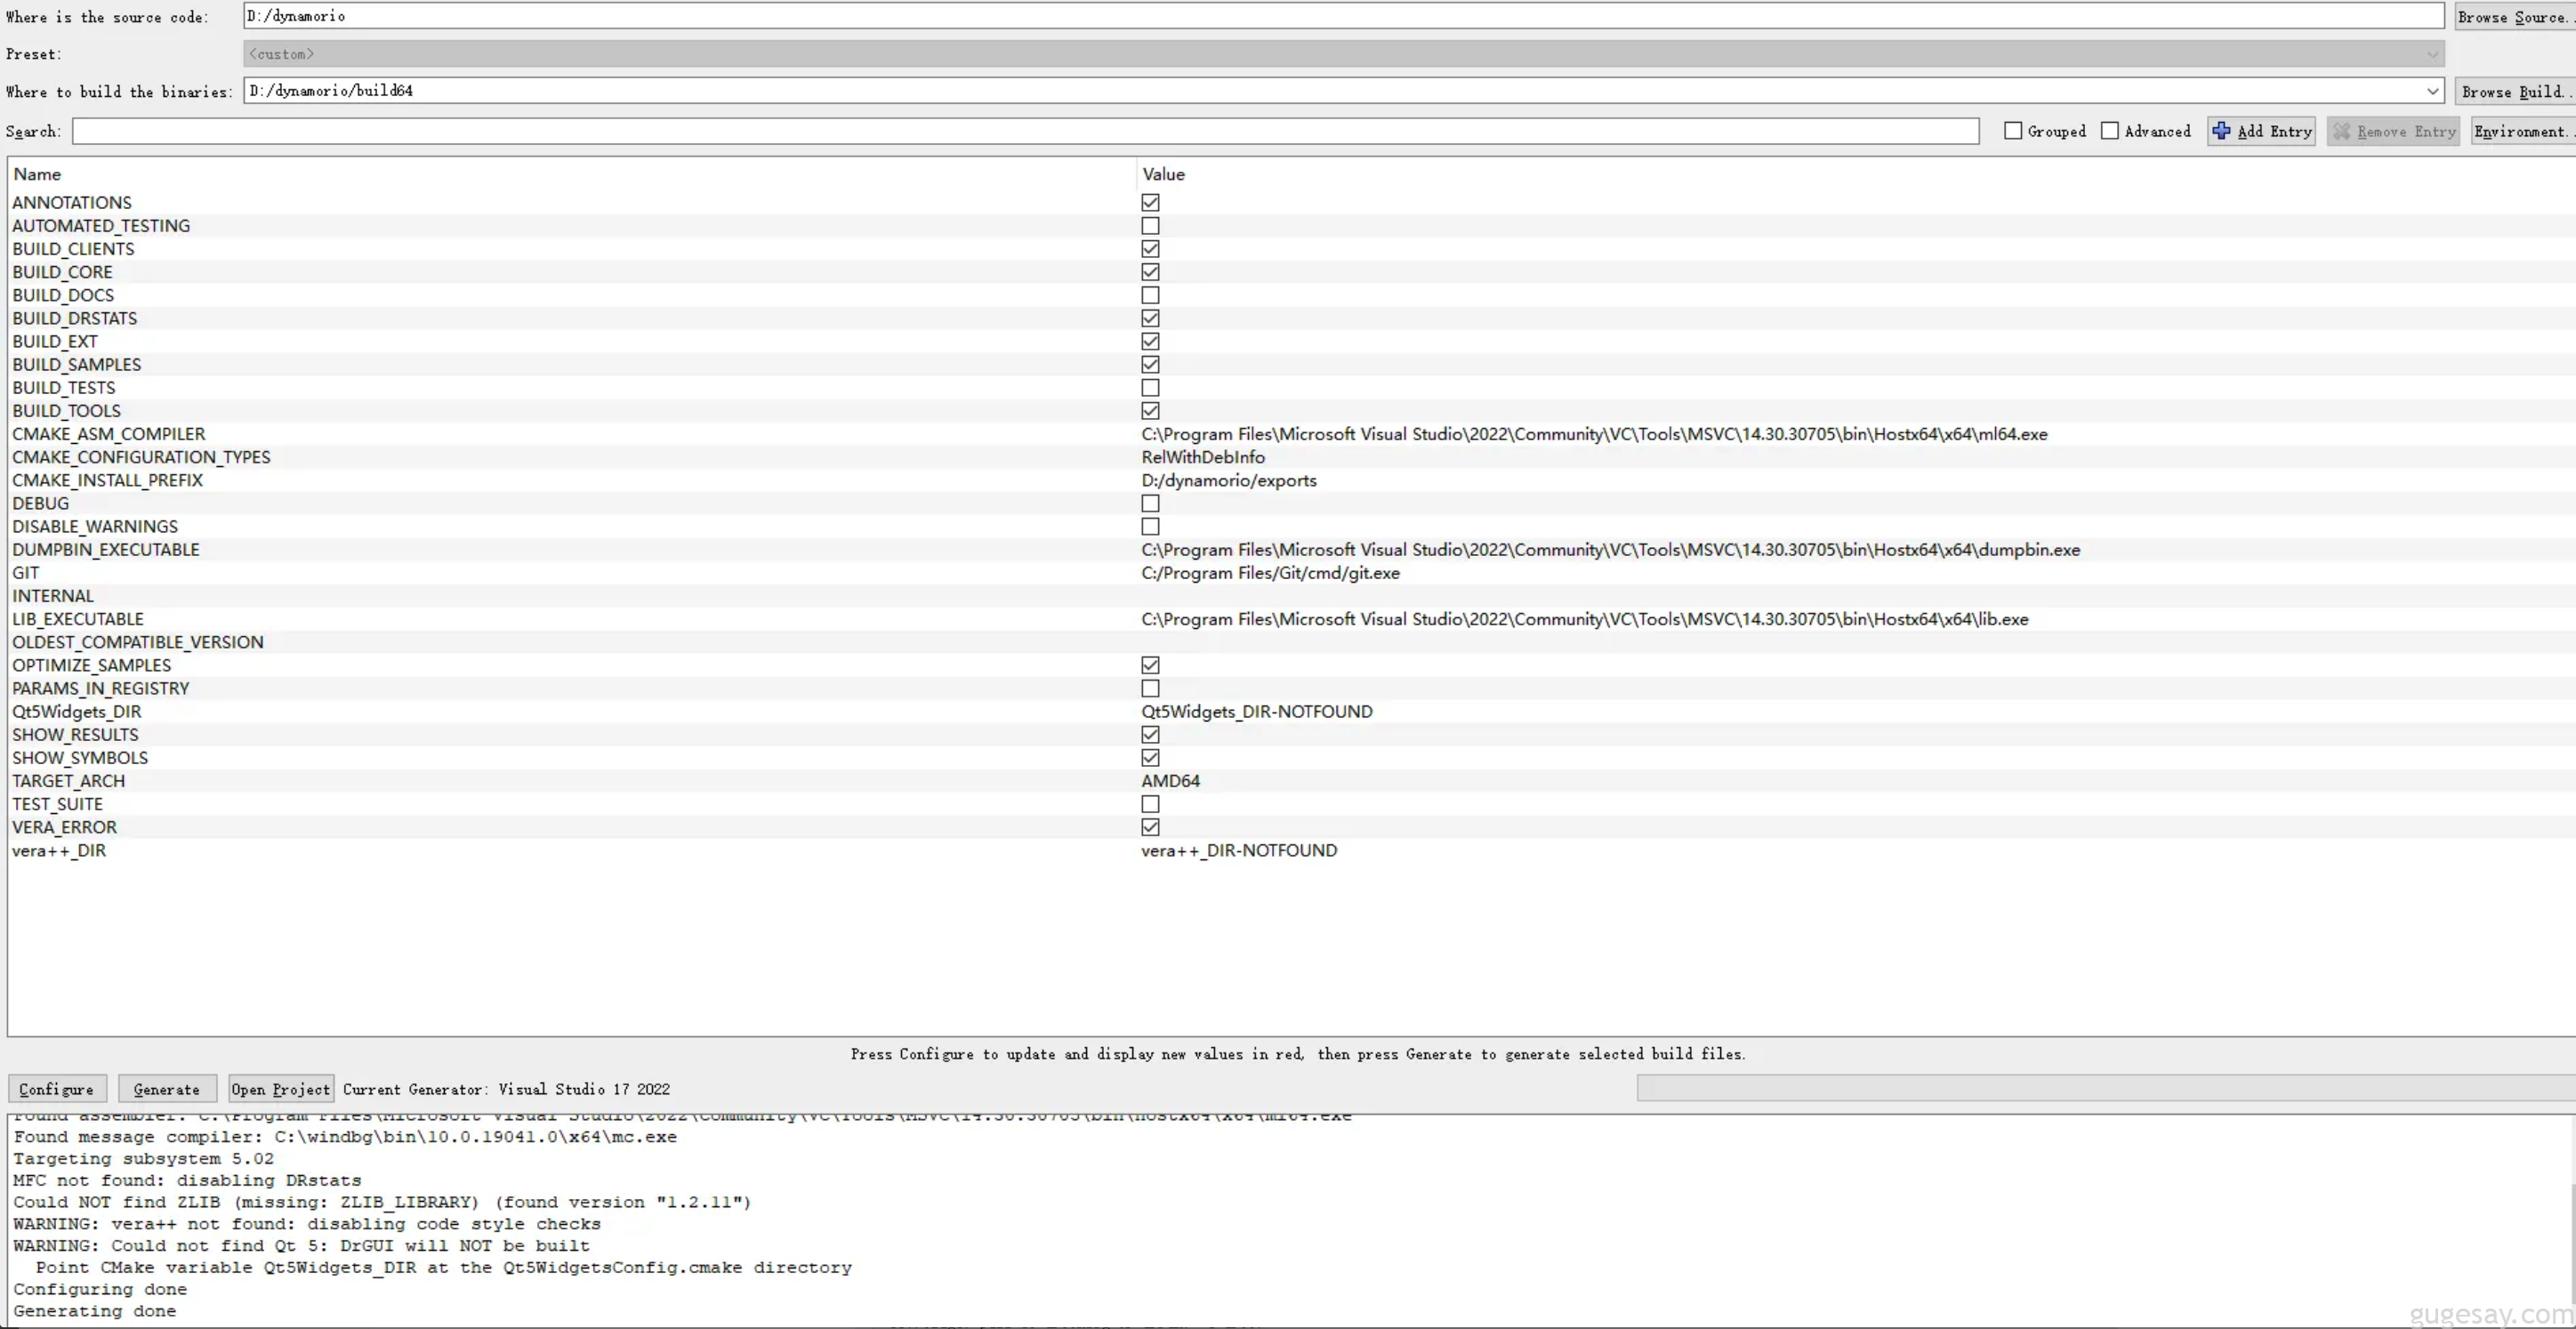
同样用VS打开D:\dynamorio\build64\DynamoRIO.sln 项目,然后生成解决方案即可。
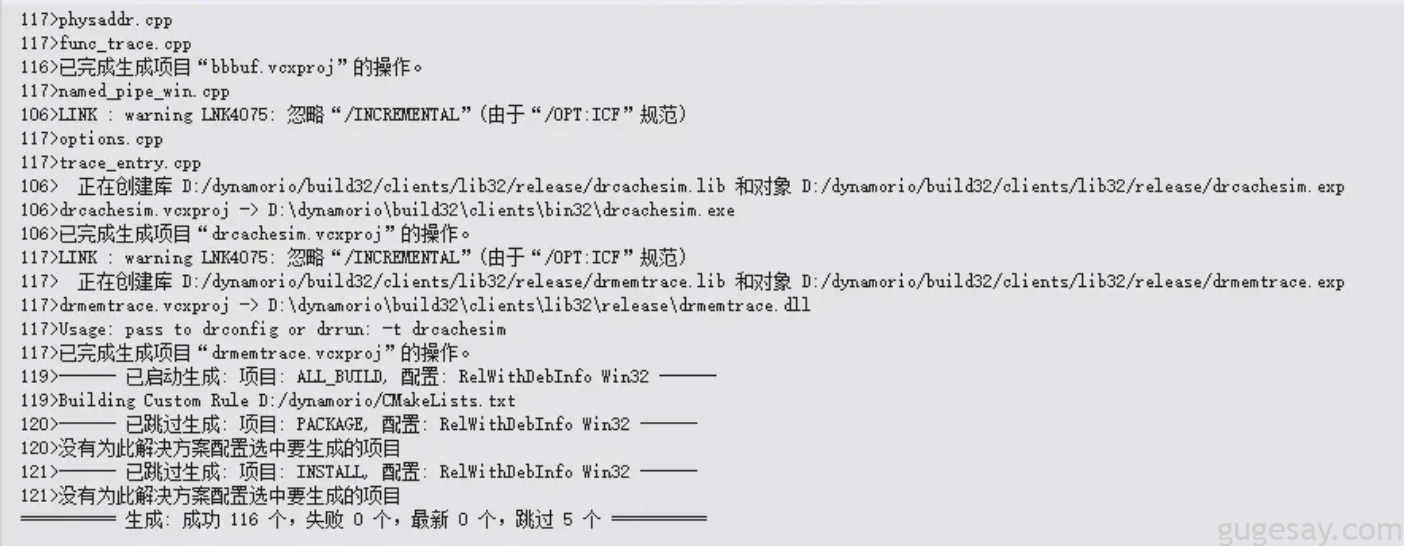
成功:
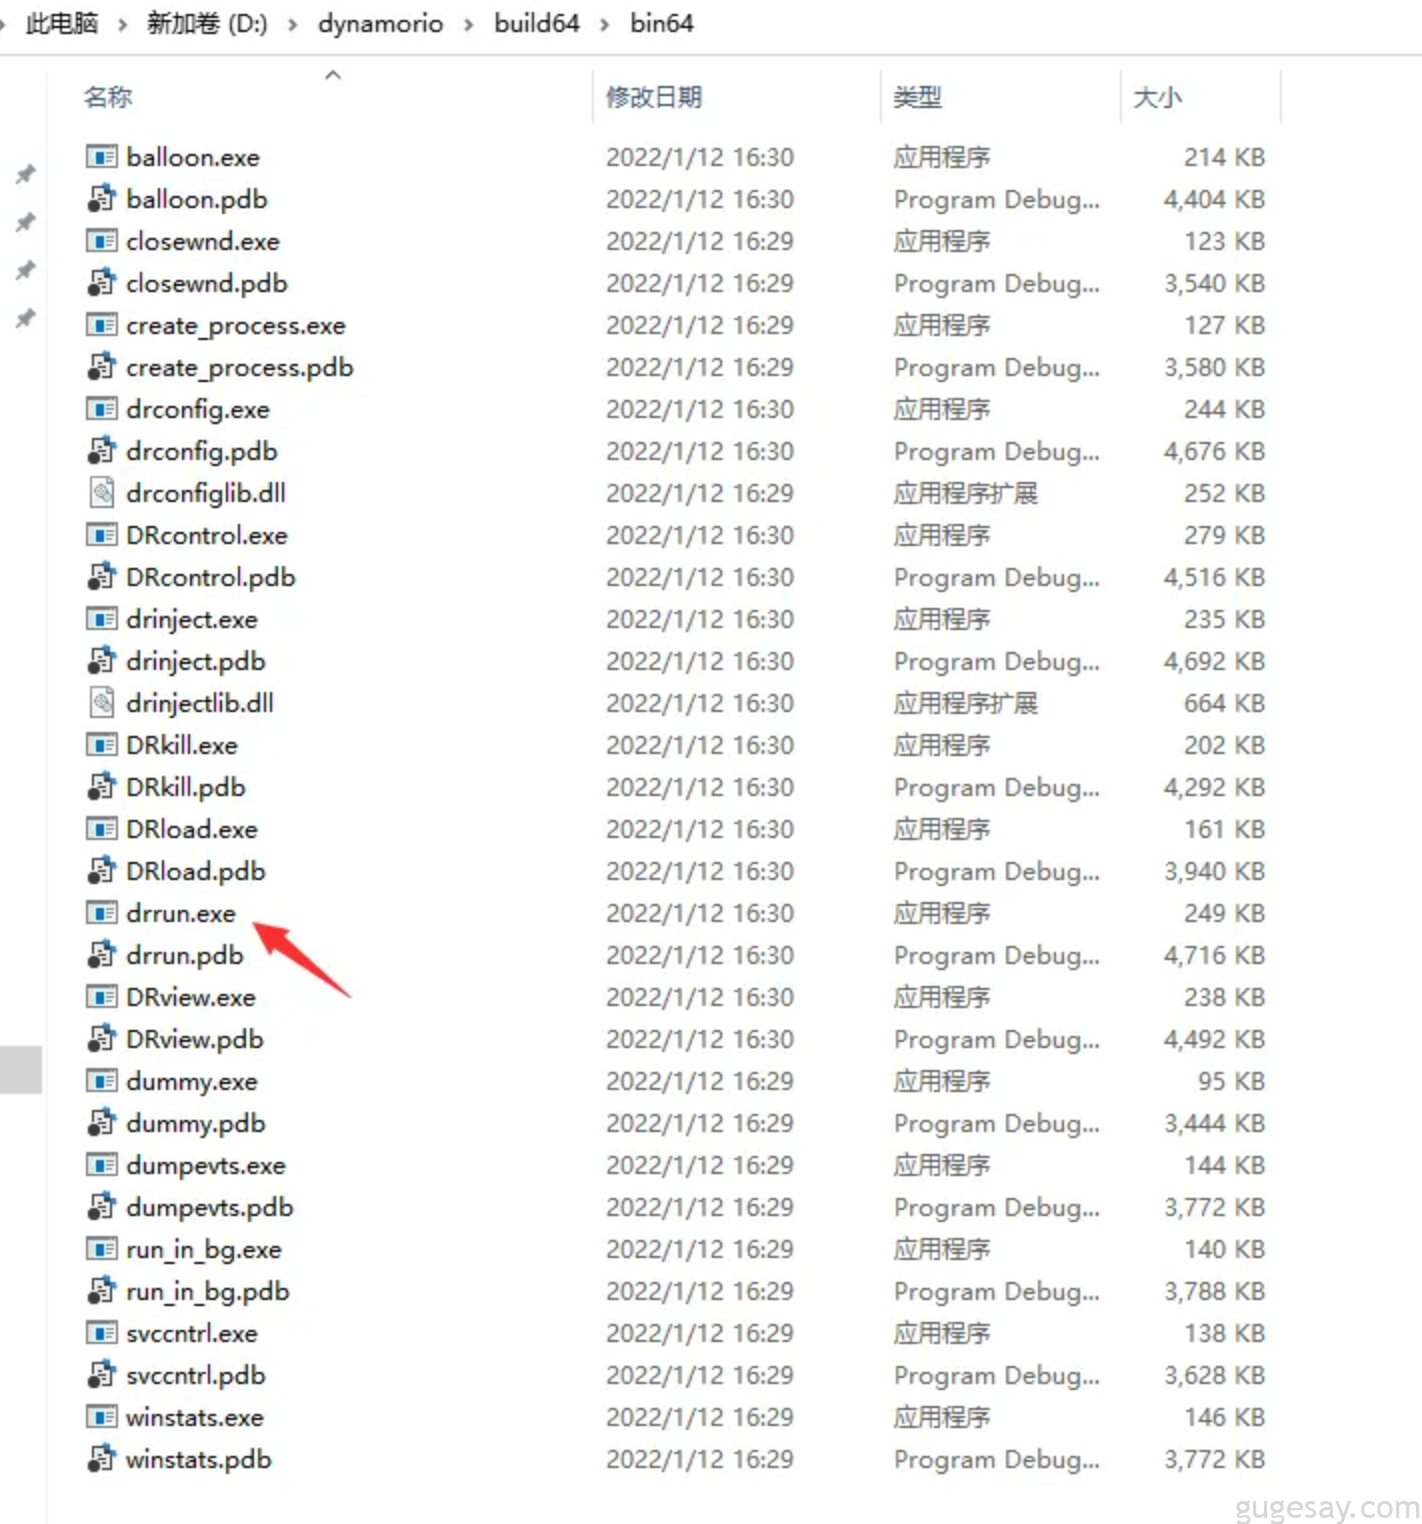
测试Dynamorio
检测程序会执行哪些代码块:
D:\dynamorio\build32\bin32>drrun.exe -t drcov -- D:\dynamorio\winafl\build32\bin\Release\ktest.exe input.txt正确运行后,会在D:\dynamorio\winafl\build32\bin\Release目录下生成相应的log文件:
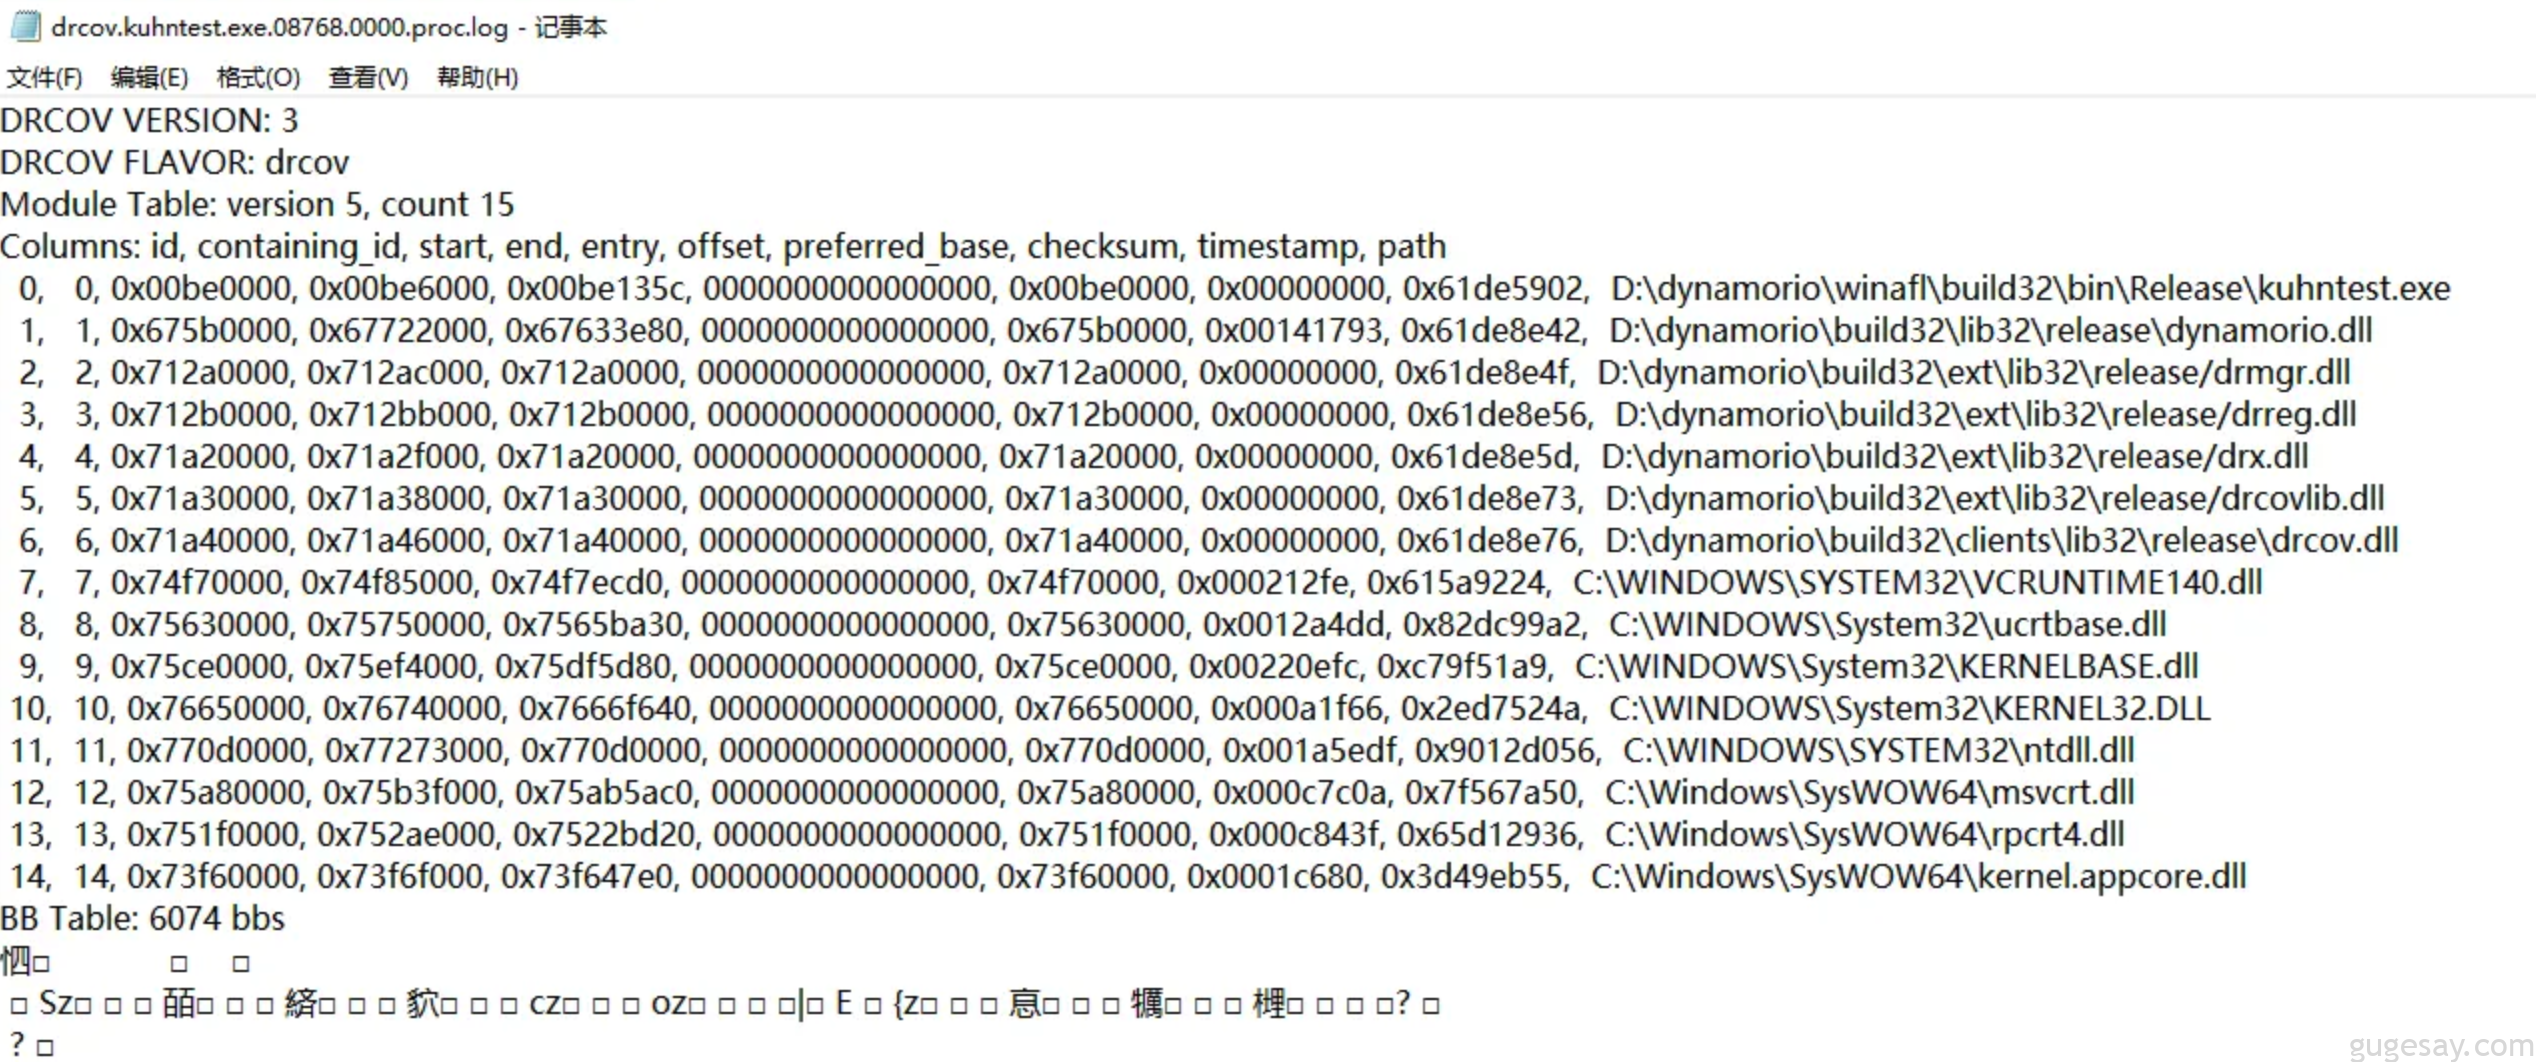
ktest.cpp的代码:
#define _CRT_SECURE_NO_DEPRECATE
#include <stdio.h>
#include <windows.h>

void fuzz(FILE* filename)
{
    char tmp[30];
    char buff[1024];

    fgets(buff, 1024, filename);    //读取文件内容
    fclose(filename);
    strcpy(tmp, buff);      //存在栈溢出漏洞
    printf("%s\n", tmp);

}

int main(int argc, char* argv[])
{
    FILE* fp;
    fp = fopen(argv[1], "rb");
    if (fp == NULL)
    {
        printf("can not load file!\n");
        return 1;
    }
    fuzz(fp);
    return 0;
}使用winafl.dll检测模块执行情况
注意:VS2019 编译时一定不要开优化!!!
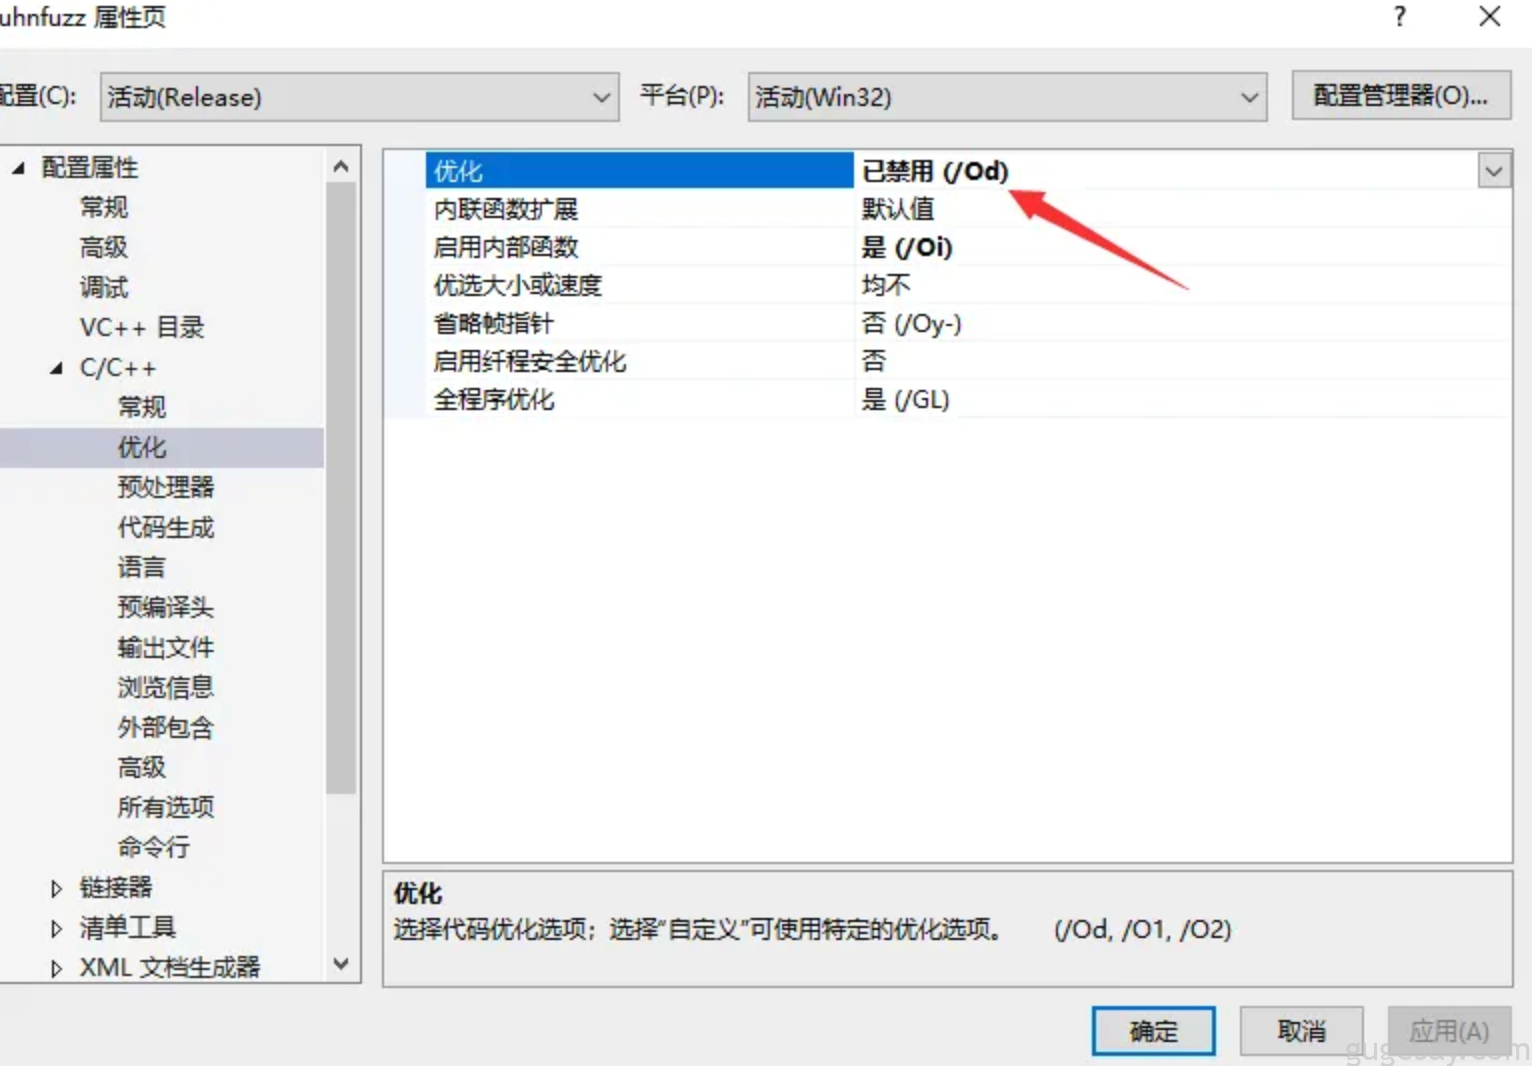
>drrun.exe -c D:\dynamorio\winafl\build32\bin\Release\winafl.dll -debug -target_module ktest.exe -target_offset 0x1080 -fuzz_iterations 10 -nargs 2 -- ktest.exe input.txt-debug //必须为debug模式, 结束后会生成一个log文件
-target_module //目标程序(只能有一个), 也是target_offset所在的模块
-target_offset //目标程序偏移,相对于target_module的偏移,在method无法导出的时候使用
-fuzz_iterations //目标程序重新启动一次内运行目标函数(即target_method)的最大迭代数
-nargs //目标程序执行所需要的参数个数(包括目标程序本身)
-target_module //目标函数,需要export或者调试符号(pdb)
-coverage_module //计算覆盖率的模块,也就是目标程序会调用的模块(dll); (可以有多个)注:要将ktest.exe和input.txt放在drrun的同目录,否则也会出现无法命中函数的情况。
成功运行后,同样会在D:\dynamorio\build32\bin32目录下生成相应的log文件:
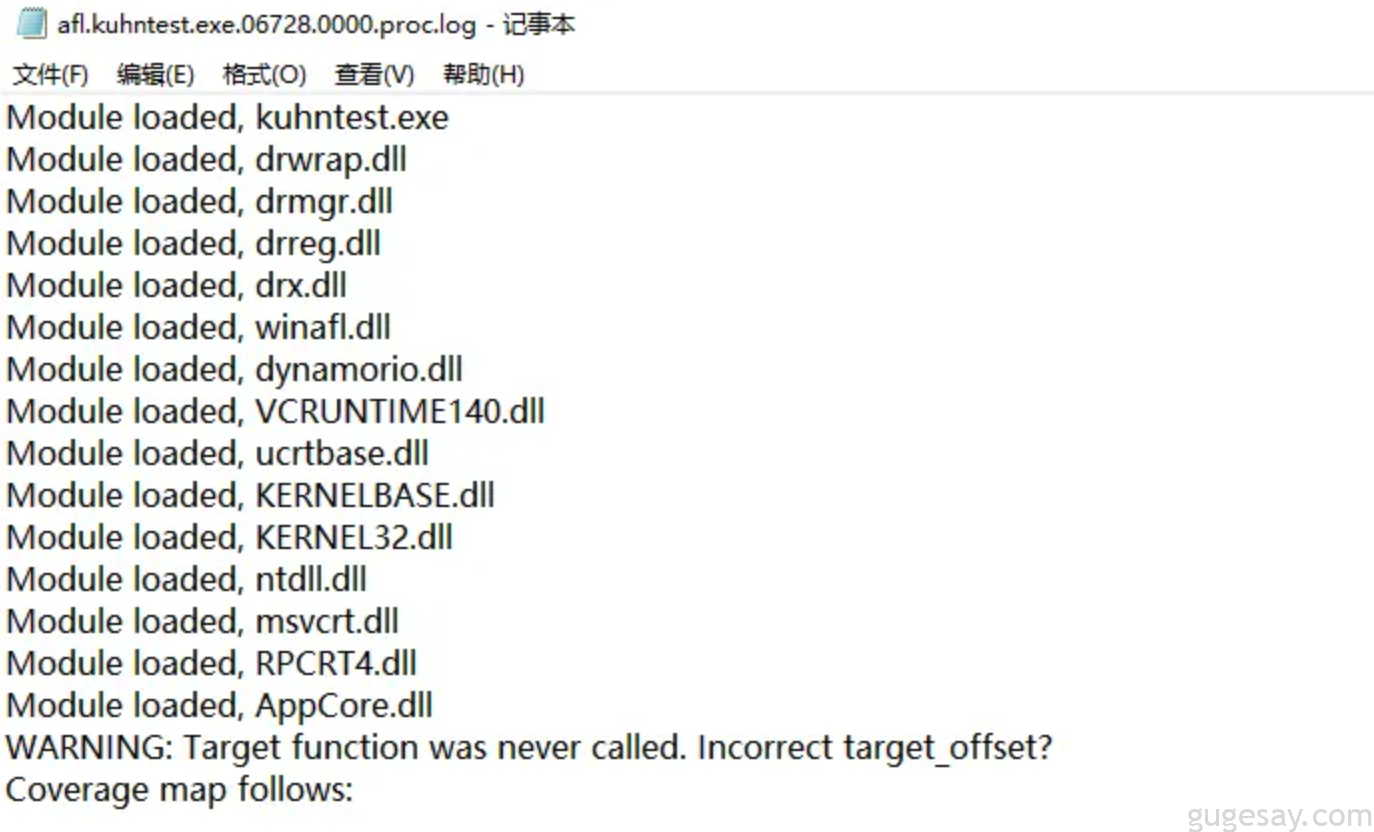
但是我这里一直显示无法命中函数,偏移地址有问题,很奇怪。
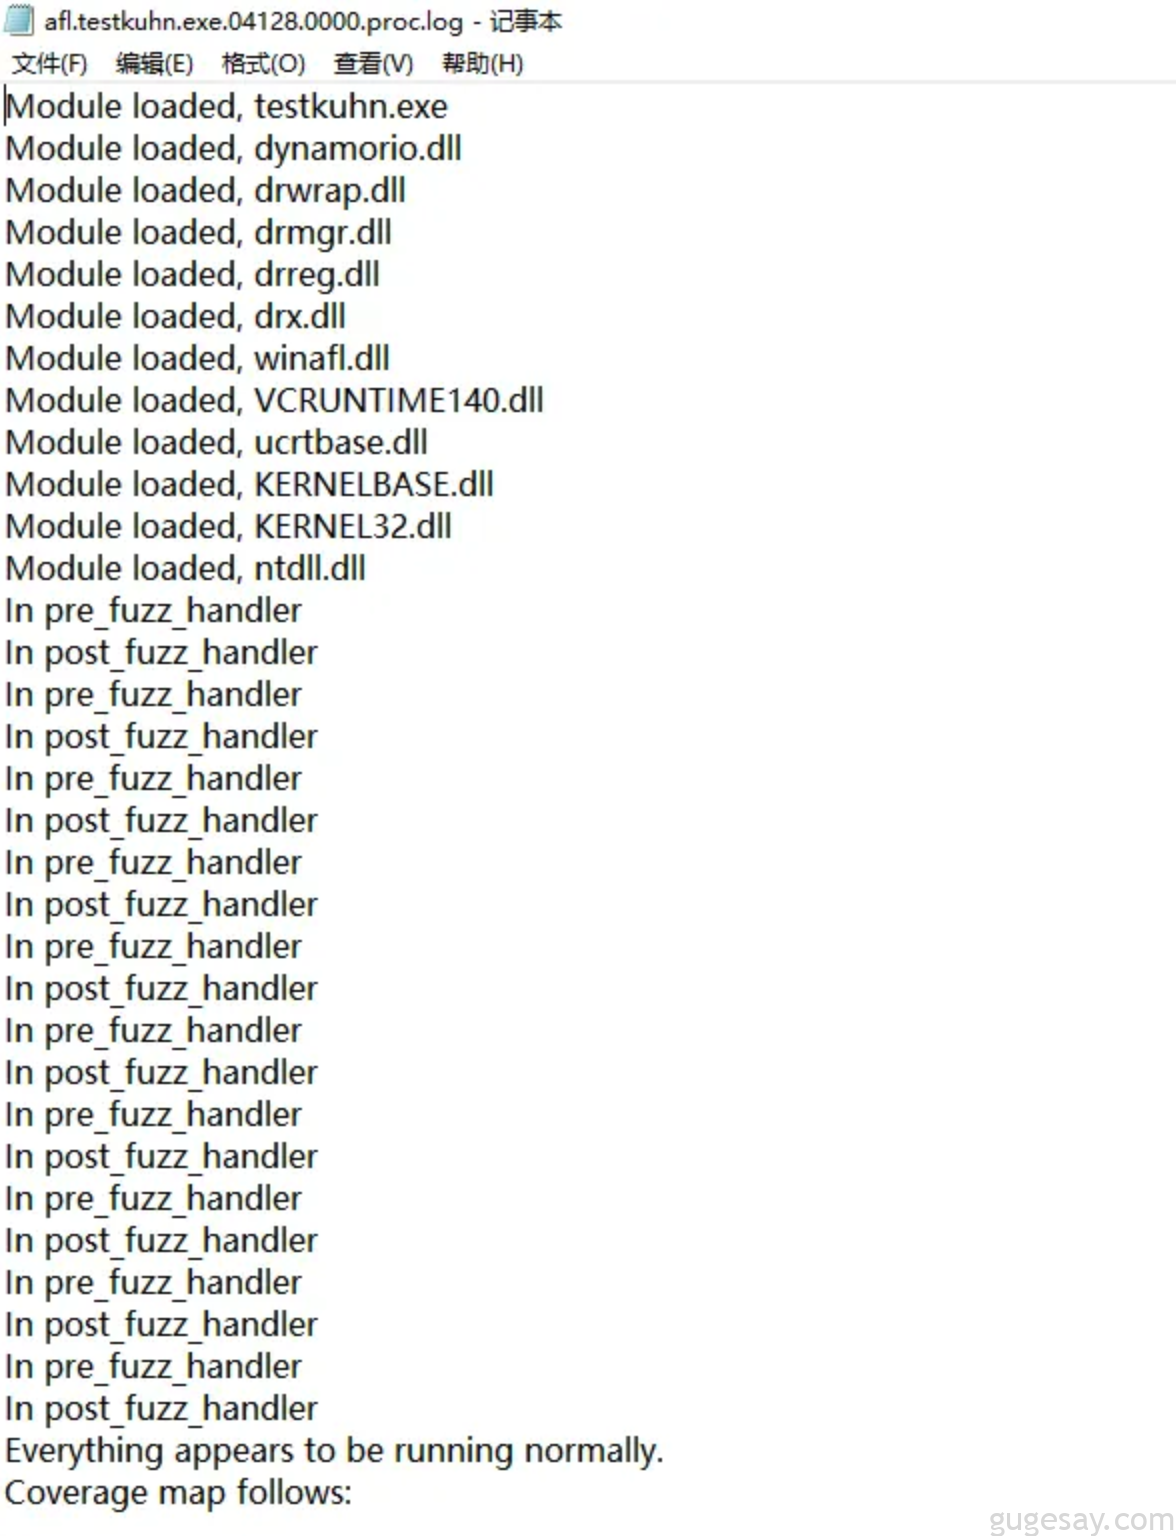
经过各种尝试和调试,终于成功!(原因是VS2019在编译时一定要关闭优化,另外cmd/powershell最好使用管理员模式运行):
WinAFL
>cd dynamorio目录
>git clone https://github.com/googleprojectzero/winafl.git
>cd winafl
>git submodule update --init --recursive
WinAFL编译(32位)
>vcvarsall x86
>cd winafl源码目录
>mkdir build32 && cd build32
>cmake -G"Visual Studio 16 2019" -A Win32 .. -DDynamoRIO_DIR=D:\dynamorio\build32\cmake -DINTELPT=1
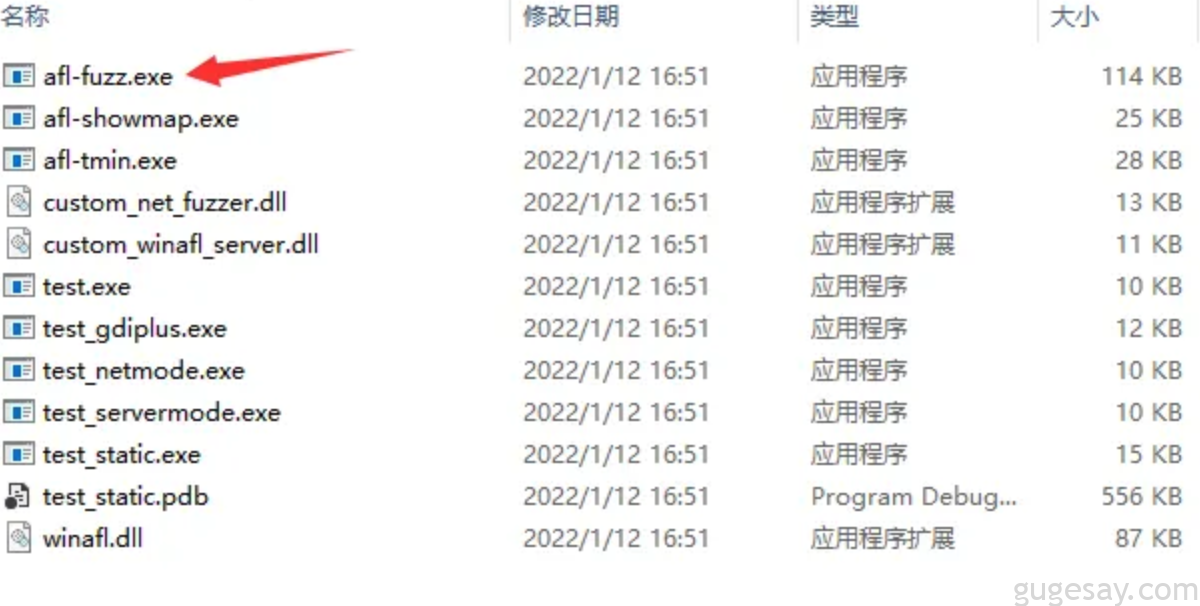
>cmake --build . --config Release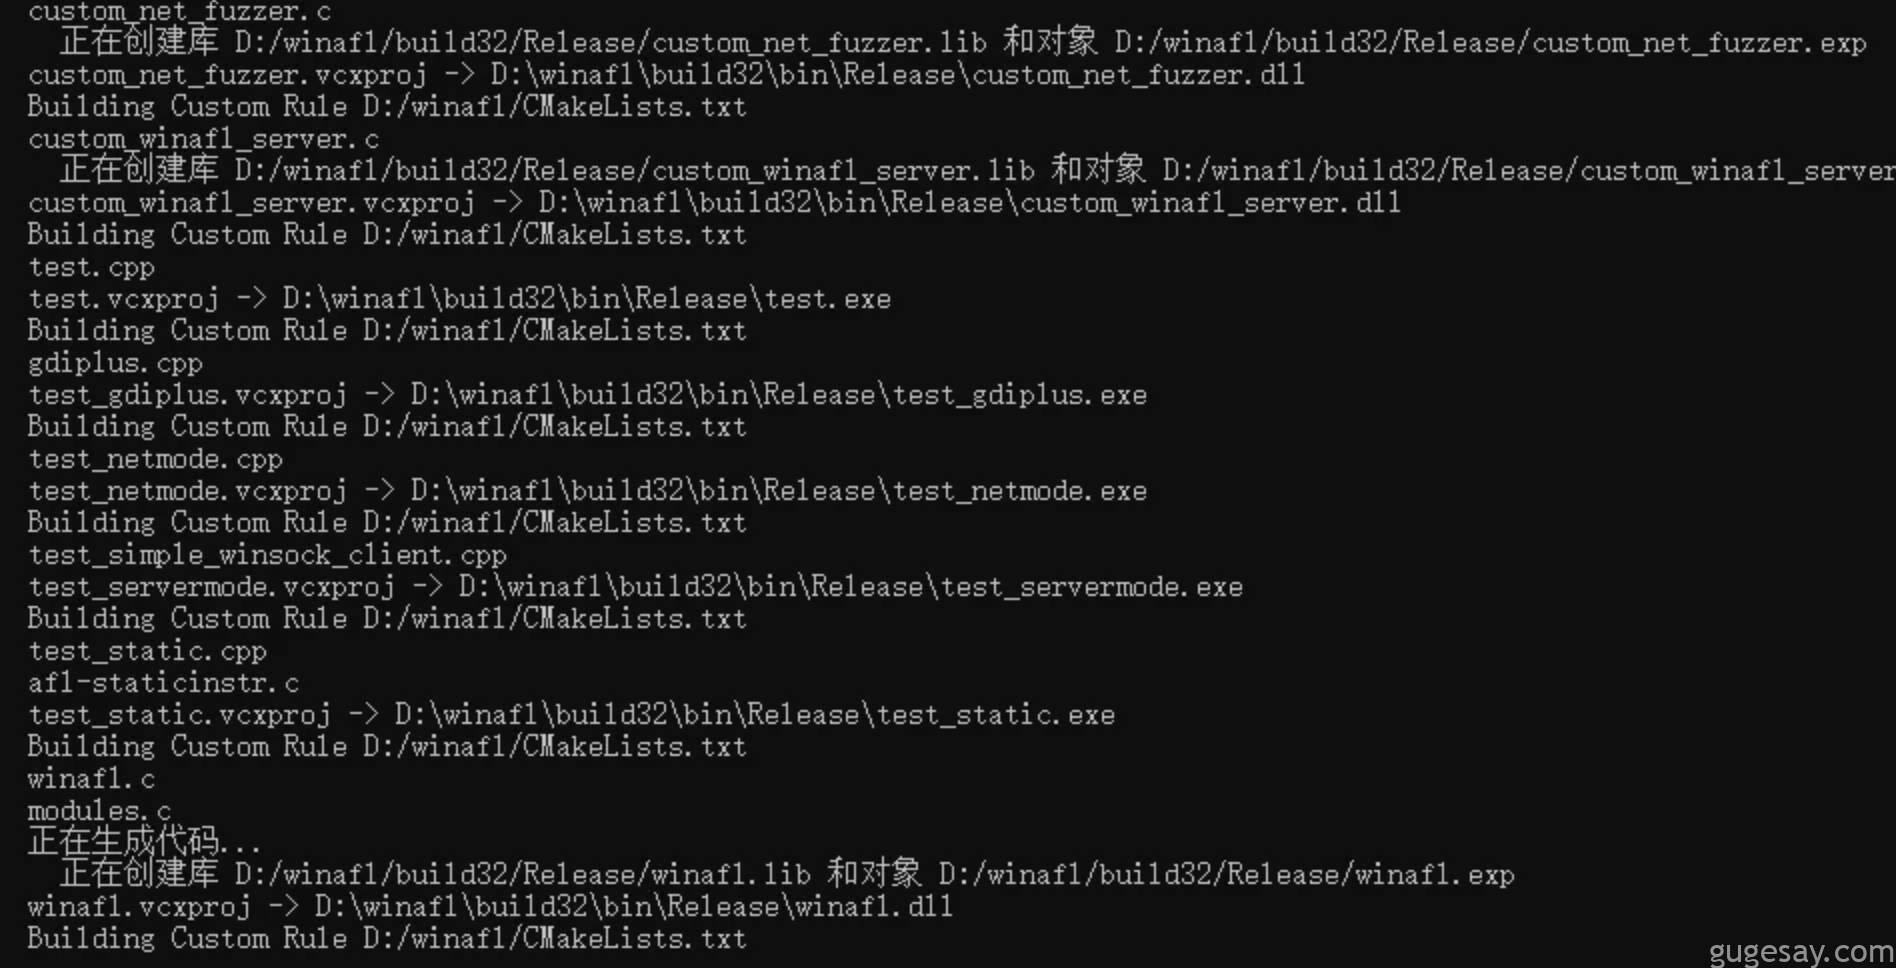
WinAFL编译(64位)
>cd winafl源码目录
>mkdir build64 && cd build64
>cmake -G"Visual Studio 16 2019" -A x64 .. -DDynamoRIO_DIR=D:\dynamorio\build64\cmake -DINTELPT=1
>cmake --build . --config Release
测试WinAFL
>afl-fuzz.exe -i in -o out -D D:\dynamorio\build32\bin32 -t 20000 -- -coverage_module ntdll.dll -fuzz_iterations 5000 -target_module ktest.exe -target_offset 0x1080 -nargs 2 -- ktest.exe @@-i //存放样本的目录
-o //保存输出数据,包括 crash文件、测试用例等
-D //DynamoRIO的路径 (drrun, drconfig)
-t msec //每一次样本执行的超时时间
第一个"--"分割符 //后面跟的是插桩的参数
第二个"--"分割符 //后面跟的是目标程序的参数
@@ //引用 -i 参数的中的测试用例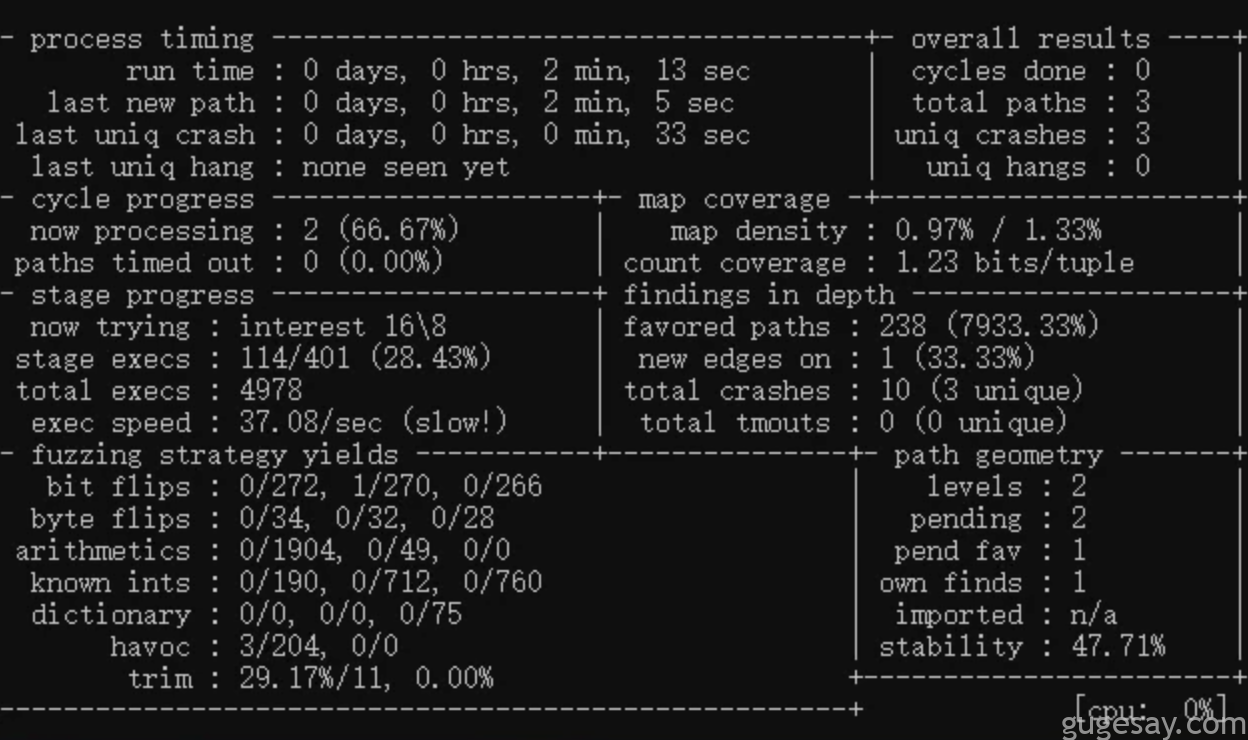
如果想要winafl在fuzz过程的界面显示彩色的话,可以在编译时:
>cmake -G"Visual Studio 16 2019" -A x64 .. -DDynamoRIO_DIR=D:\dynamorio\build64\cmake -DINTELPT=1 -DUSE_COLOR=1运行afl-fuzz后的界面(还是彩色好看):
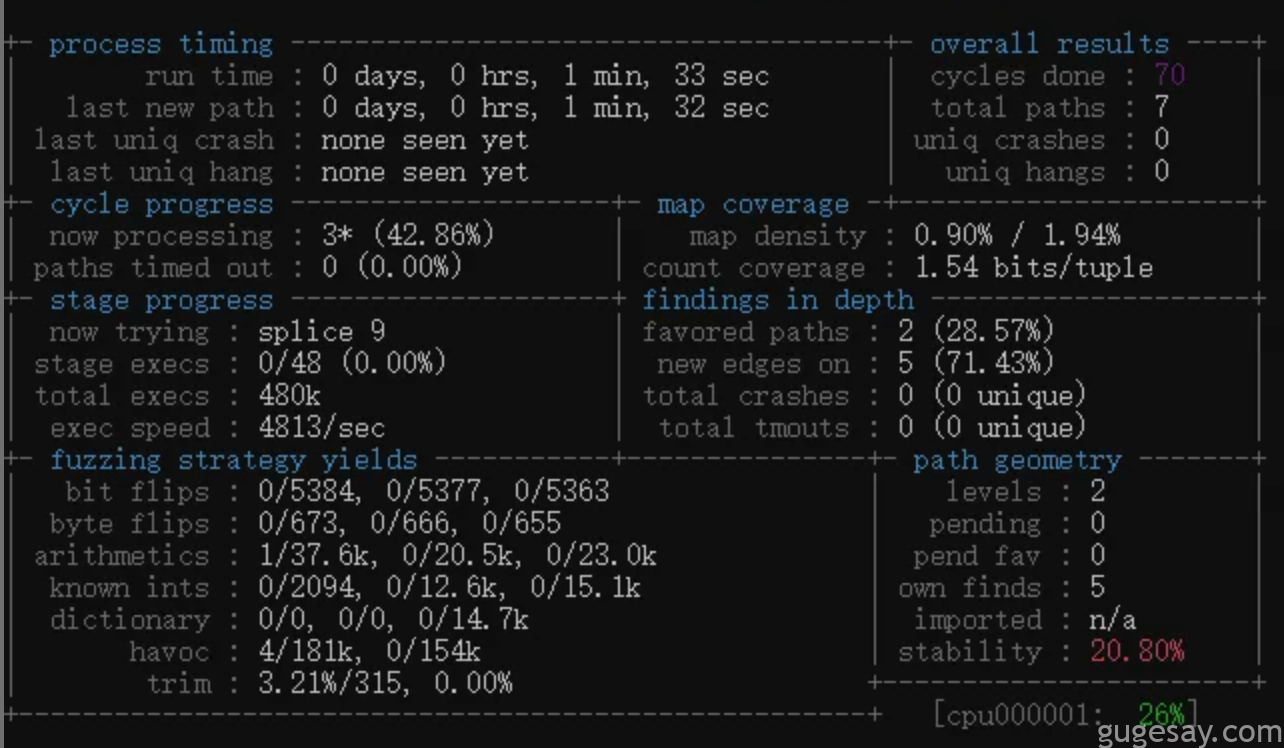
Process timing      //Fuzzer运行时长、以及距离最近发现的路径、崩溃和挂起经过了多长时间
Overall results     //Fuzzer当前状态的概述
Cycle progress      //当前Fuzz的进展
Map coverage        //目标二进制文件中的插桩代码所观察到覆盖范围的细节
Stage progress      //Fuzzer现在正在执行的文件变异策略、执行次数和执行速度
Findings in depth   //有关我们找到的执行路径,异常和挂起数量的信息
Fuzzing strategy yields //关于突变策略产生的最新行为和结果的详细信息
Path geometry       //有关Fuzzer找到的执行路径的信息
CPU load            //CPU利用率
关于覆盖率
首先是安装IDA Pro
然后是安装Lighthouse插件,安装之前,要安装好Python环境,我使用的是Python3.9:
>git clone https://github.com/gaasedelen/lighthouse.git然后将lighthouse下plugin目录中的所有文件拷贝至IDA的plugin目录下,然后重新启动IDA pro,然后在Load File的最下方可以找到打开覆盖率日志文件。
使用drrun.exe -t drcov可以生成log日志,供IDA插件lighthouse查看覆盖率
>drrun.exe -verbose -t drcov -- testkuhn_ok.exe经过各种Google搜索寻找,发现新版的dynamorio生成的log日志文件,默认drcov格式为version 3.0,lighthouse无法打开!
无意中搜到一篇绿盟的文章,提到了解决方法:
解决办法有两种,一种是修改drcov.py,注释掉assert这行代码,至少DynamoRIO 9.0.1生成的.log文件就可以加载了;另一种是不改drcov.py,用WinHex修改.log的头部,把”DRCOV VERSION: 3″的3改成2。
使用了第二种方法,然后再使用IDA pro打开覆盖率日志文件,成功!
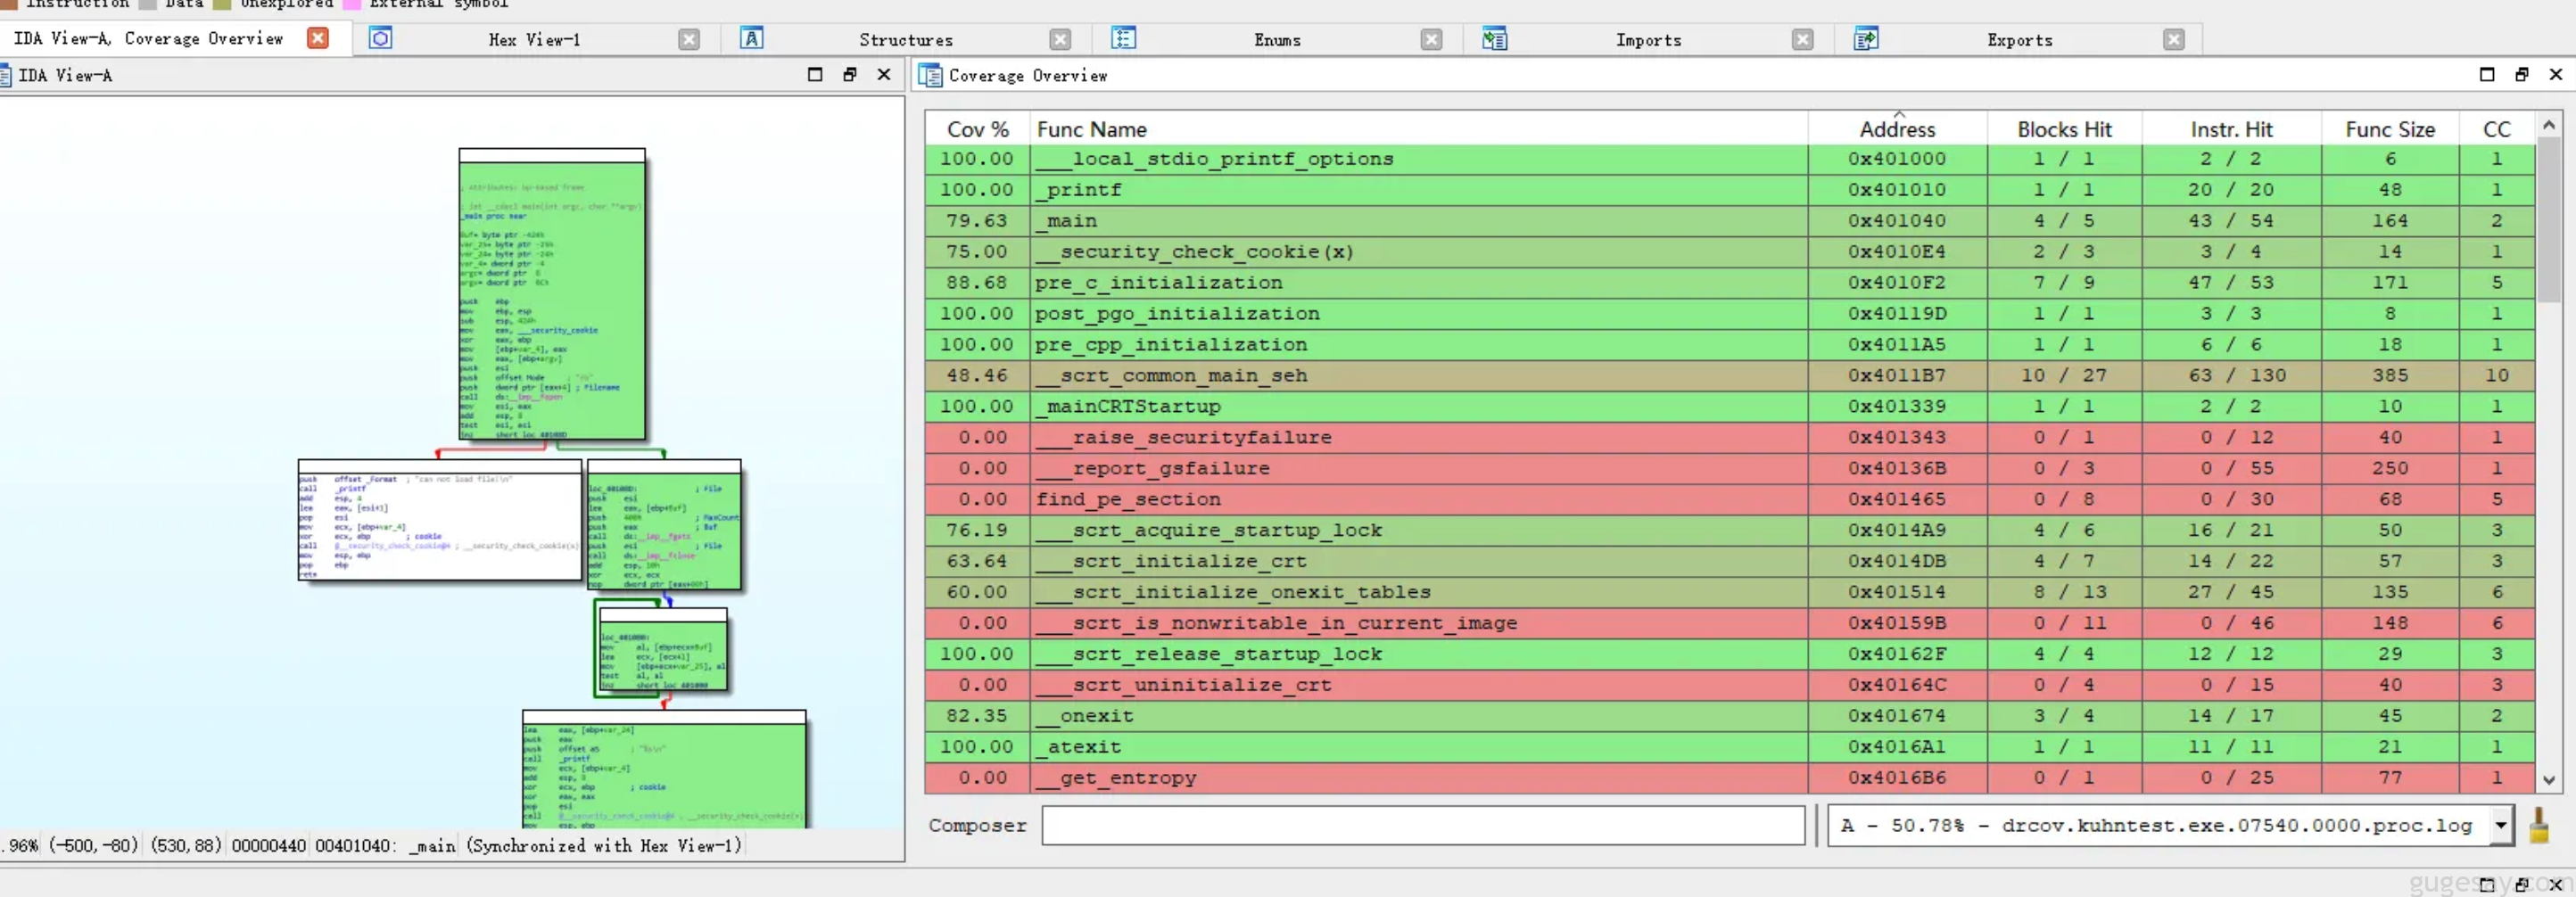
view-subview-Coverage Overview


